Richie Brace Adjustments
One of the more common questions we receive at the lab around Richie braces is around adjustments. Particularly if you don’t have a lot of experience with prescribing and fitting Richie braces, we find some podiatrists can be a little unsure I they can be adjusted.
Just like most custom foot orthotics, Richie braces are certainly easily adjusted. Both the footplate and the leg uprights are made from polypropylene, which means they can be spot heated and ground down if required. This means you can make most adjustments in your clinic, rather than inconveniencing the patient by taking their brace off them to send back to the lab. Let’s look at some of the common reasons you’d want to adjust a Richie brace at the time of fitting or at a follow up appointment.
Medial/Lateral Malleolous Irritation
In patients with adult acquired flatfoot, a high amount of force goes through the medial ankle as the tibia, somewhat disconnected to the foot by attenuated ligaments, internally rotates. This force can be so high in some patients that even light pressure from the medial upright of the Richie brace can be irritating or even unbearable in some cases. There are two simple adjustments that can be made to the brace if this is the case:
- Add an ‘extrinsic medial heel skive’. Cut a piece of EVA that is roughly half the width of the heel and extends from the posterior/plantar heel to the medial cuneiform. Grind a wedge/bevel so that it creates a medial wedge (thicker on the medial side). Glue this on top of the top cover to create and extrinsic medial heel skive. This will increase the rearfoot control and may reduce the medial malleolus irritation.
- Spot heat the medial ‘wing’ of the footplate. This is by far the most successful adjustment for this problem. Remove the upright pad and undo the Velcro straps. Spot heat the polypropylene on the medial wing of the footplate – just under the medial hinge. Once the plastic is hot enough (you’ll see it become quite shiny), place the brace on the desk/bench and push from the top of the upright down. This will cause the plastic to bow out at the medial malleolus. Note – you don’t need to try to push from inside the brace at the ankle region – just push from the top of the upright in an inferior direction. I find where people tend to go wrong here is when they’re not aggressive enough with pushing down. You can bow the plastic out quite a bit here to get the desired result. Of course the above adjustments can be reversed to the lateral side in the case of lateral malleolus irritation in the highly supinated foot type.
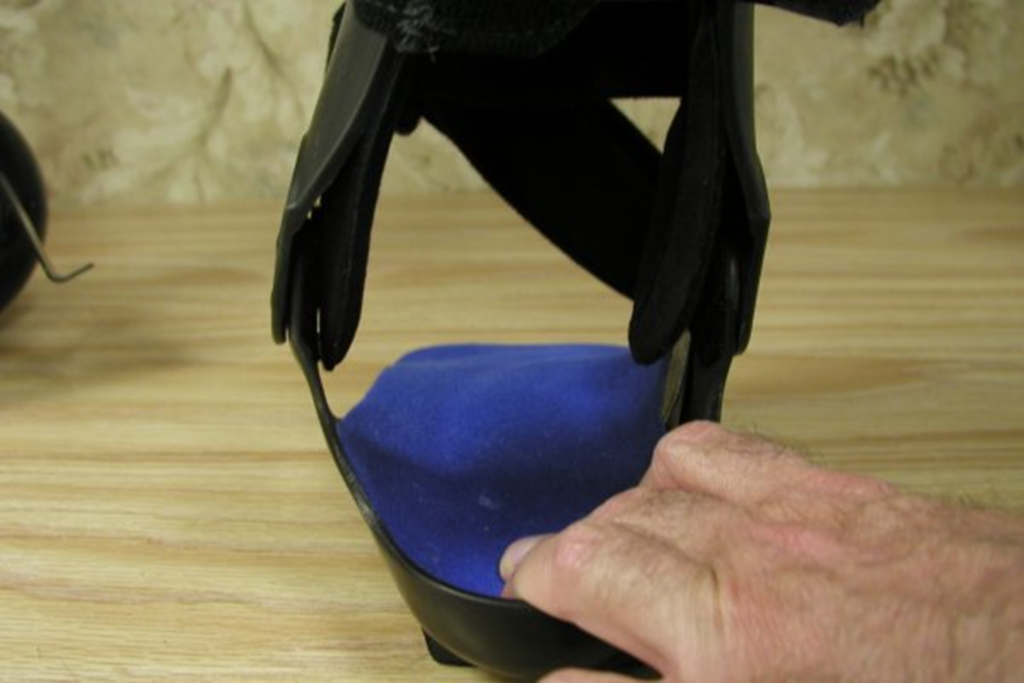
Leg Upright Irritation
In patients with the inverted champagne bottle leg, the top of the leg uprights of the Richie brace
can cause some irritation. Again, being polypropylene, this means they can be easily spot heated.
Simply remove the pad and apply heat to the inside of the leg upright. Once the polypropylene is hot enough, you can then use your judgement to flare out the top of the upright enough to accommodate the patient’s leg anatomy.
Knowing how to perform these quick and easy adjustments can lead to increased patient compliance
and satisfaction, and increased confidence in prescribing the Richie brace in your practice.
