Clinical Pearls for the Flat Foot Patient – Part 2
In part 1 of this 2 part blog, we explored the pathophysiology and clinical assessment of patients with a painful flatfoot. Understanding the stage at which your patient presents gives clear direction as to the best course of conservative treatment. This blog will focus on orthomechanical treatments. In all stages, physical therapy which includes balance exercises are critical and when appropriately coupled with orthomechanical care will lead to a much better chance of good outcomes. Of course surgery may be required in some cases, but with strict adherence to conservative treatments, surgery can be minimized.
Stage 1
In stage 1, we’re primarily dealing with a posterior tibial tendinopathy in a flat foot. In some cases, patients may require short-term immobilization to effectively settle their pain. Most patients in this stage benefit from a well-made custom foot orthotic. The pronatory forces are large in these patients (irrespective of the size of the patient themselves), so a large amount of force on the medial side of the subtalar joint axis is needed. As such, prescription parameters may include:
- Semi-rigid to rigid shell material – 3.5mm to 5mm shell thickness.
- Deeper heel cups – usually over 16mm.
- Medial heel skive – 4mm and above.
- Medial flare/flange – assists with transverse plane control through the talonavicular joint.
- Extrinsic rearfoot post – increases rearfoot stiffness of the orthotic.
Stages 2-4
Usually by the time a patient is classified in stage 2, the key ligamentous structures (e.g. spring ligament) are involved which leads to discernable change in foot morphology – the symptomatic foot is flatter compared to the asymptomatic foot. Patients find it difficult to perform a single leg heel raise.
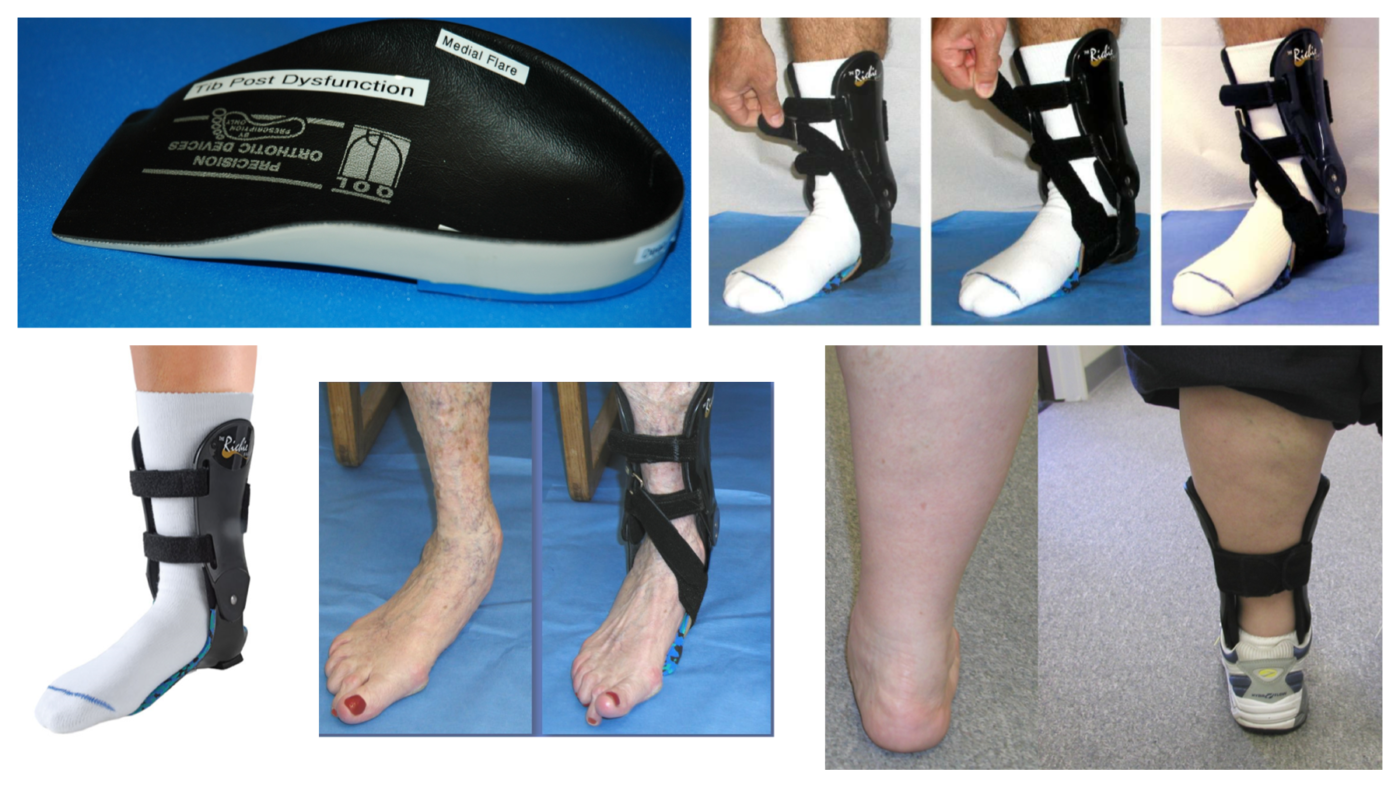
Where ligamentous involvement is clear, the preferred orthomechanical treatment is a custom ankle-foot-orthosis (AFO), rather than just a foot orthosis. The AFO helps to restore the coupling between the leg and foot which reduces with ligamentous attenuation or rupture.
The Richie brace is a custom AFO which podiatrists can prescribe from a cast of the lower leg and foot. For stages 2 and 3, the following prescription parameters can be followed:
- Standard Richie brace – this allows for normal sagittal plane motion at the ankle (i.e. normal plantarflexion and dorsiflexion), but helps to restrict the pathological frontal and transverse plane forces acting through the rearfoot.
- Medial heel skive – 4mm and above.
- Lateral flare/flange – many of the patients have forefoot abduction and can slide laterally off the foot plate. A lateral flare/flange will control that forefoot abduction.
- Full rearfoot post – the Richie brace range comes with a small heel stabilizer bar as the extrinsic post. Changing to a full rearfoot post increases the rearfoot stiffness of the AFO.
- Medial malleolus accommodation – a lot of force is transmitted onto the medial upright in the area of the medial malleolus. This is required to resist internal tibial rotation. For some patients, this can be a source of irritation. By requesting a medial malleolus accommodation, extra plaster will be added to the area so the medial upright bows out in this area.
For stages 3-4 a standard Richie brace may not be sufficient to control the deformity, in which case the following prescription parameters may be better suited:
- Medial arch suspender Richie brace – it is important to note that the medial arch suspender brace is built on a restricted hinge brace. This means the uprights are fixed at 90° to the foot plate which virtually restricts all sagittal plane movement at the ankle. A medial arch suspender strap can not be added to a standard Richie brace. To manufacture the medial arch suspender Richie brace, the plastic shell is cut out in a semi-circular shape under the medial longitudinal arch, a thin layer of cork is laminated in the area of the cut-out and a strap is attached underneath which wraps around the medial midfoot, across the anterior ankle up to a D ring on the lateral upright. The patient can then self-tension this strap.
- Medial heel skive – 4mm and above.
- Full rearfoot post – the Richie brace range comes with a small heel stabilizer bar as the extrinsic post. Changing to a full rearfoot post increases the rearfoot stiffness of the AFO.
- Medial malleolus accommodation – a lot of force is transmitted onto the medial upright in the area of the medial malleolus. This is required to resist internal tibial rotation. For some patients, this can be a source of irritation. By requesting a medial malleolus accommodation, extra plaster will be added to the area so the medial upright bows out in this area.
Note the medial arch suspender Richie brace is contraindicated in very obese patients as the shell cut-out weakens the brace. It is also contraindicated for patients with severe forefoot abduction.
What If I’m Unsure?
We commonly talk with podiatrists who are unsure if they should prescribe the standard Richie brace or the medial arch suspender Richie brace. Generally speaking if the patient has a fairly rigid rearfoot with plantar subluxation of the medial cuneiform, the medial arch suspender Richie brace is appropriate. If the rearfoot has normal or only slightly reduced range of motion and there is no plantar subluxation of the medial cuneiform, the standard Richie brace is more appropriate.
Finally, a standard Richie brace can be converted to a medial arch suspender Richie brace if needed. However a medial arch suspender Richie brace can not be converted back to a standard Richie brace.